Putting together an Expedition Deck in Legends of Runeterra is no easy task. Not only do you not know what you're going to get, but you never know what you're going to come up against. However, there is still a lot of skill built into the mode if you know how to pick and replace cards.
The following guide breaks down Expeditions to give you an idea of how they operate and then outlines certain tips and tricks to help you achieve the coveted seven wins.
Video Guide
If you find you'd rather learn how to draft expeditions in video form we've got you covered with Mattheos' video version of this drafting guide! If video guides aren't your cup of tea then read on for the written article!
Starting Out
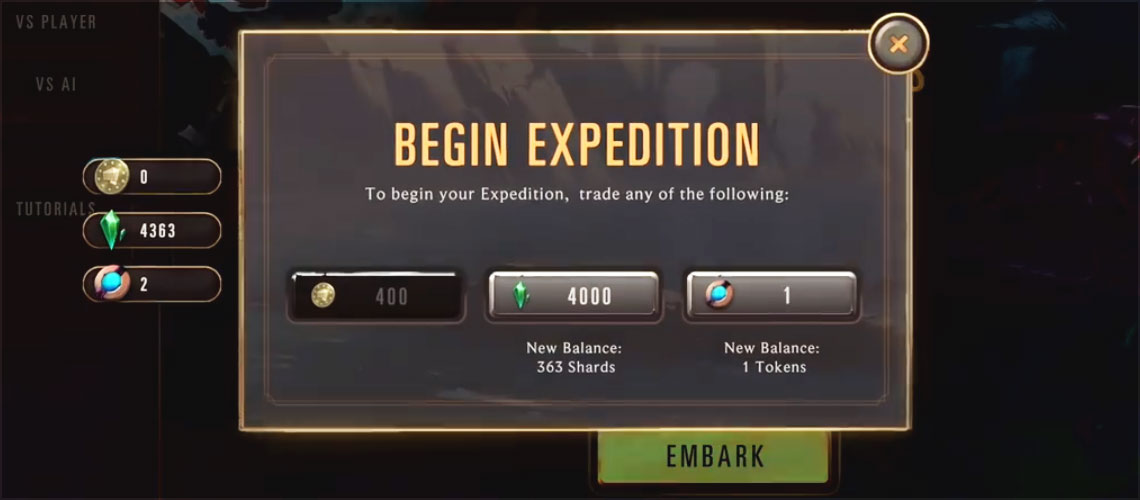
As with other card games, you need to pay a small fee to begin your draft. An expedition costs either 300 coins, 3000 shards, or an Expedition Token. Coins and shards can both be acquired by playing the game, while tokens are given out from Riot for special events.
No matter how you decide to play, you can only get rewards from three Expeditions per week. Of course, you can play as many as you like, but all of them beyond three come under "Open Play" rather than regular draft mode.
Once you enter your Expedition, you get to play two different drafts, also known as trials. That means you're always getting two Expeditions for the price of one.
Building Your Deck
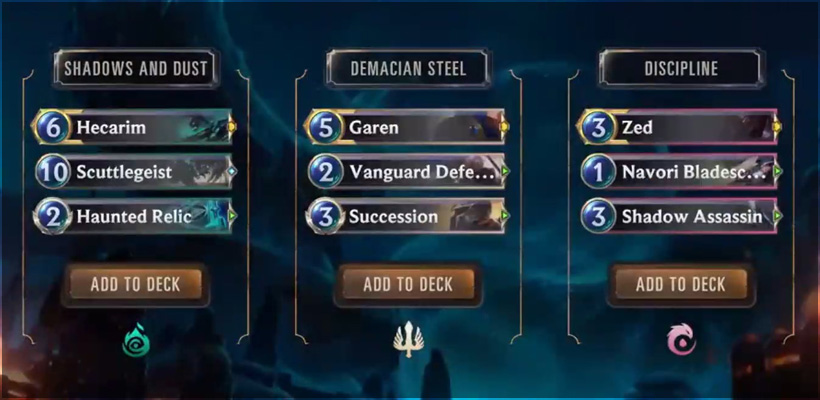
When building a deck in Runeterra, rather than getting one card, you get the choice between three different pairs of two. They will either come from one, two, or three different regions depending on where your champions come from.
The first two picks of your Expedition give you three packs of three cards rather than three packs of two. That is because they each come with a champion in addition to the two regular options. Picking here is vital because, not only will it affect what cards you get offered to you later (you only get offered cards from your champions' regions) but it also dictates what type of deck you're going to build.
If you can, get two champions that work well together. If you don't get that option, do your best to get a pair of the strongest champions available or ones from two regions that work well together. If you need help figuring out how certain cards work together, you can hover over the trio for more information.
After you first two picks go by, you will then get offered either a "synergy pick" or "wild pick" that come with three packs of two. The synergy picks fall in line with the picks you made earlier in the Expedition, while wild picks will have a mixed bag of different options.
This will go on for fifteen rounds. At the end, you get the option to switch out one of three random cards you picked for a different one. You can only switch one of the three, but you also have the option to switch none if you so choose.
Going on an Adventure
Once your deck is built, you need to play your Expedition. Expeditions end in one of two ways; when you lose two games in a row or when you get seven wins. However, the seventh game is for all the marbles, meaning you only get one chance to win. If you lose, your Expedition comes to an end.
As you go, Runeterra allows you to upgrade your Expedition deck in between rounds. You get the option to add a third champion early on in the draft, which allows you to add on a third region if you so wish, and you also get more chances to trade out your cards.
In that way, you can slowly make your deck stronger with each win or loss.
A Second Chance
Once your draft comes to an end, from either losing or winning, you get to advance to your second trial.
Your second go operates in the exact way as the first trial. You start by picking your champions, go through fifteen rounds to build a deck, and then play until you lose two or win seven. No matter what happens, once your second trial comes to an end you get your rewards.
Rewards
When playing one of your three reward-based Expeditions, you get your final haul based on the trail you did the best in. As such, if you won zero games in one and seven in the other, you get the seven win reward tier. This allows you trial-and-error and mitigates some of the randomness that comes from a weak draft pool.
No matter how you finish, you get at least one champion card. In addition, a seven-win run gives you 4,000 shards so you can jump into another run right away.
Tips and Tricks: Choosing Your Champions
As touched on above, your first two picks are vital when building your deck. Synergy is key to a successful Expedition, and that comes from getting the right champions.
However, a lack of synergy is not the end of the world. There are many individually strong champions in Runeterra. If you can't get ones that work together, go for the most powerful ones that give you good bang for your buck.
Note that you will get a chance to add more champions to your deck throughout a run. You can either get new ones or double up on the ones you already have. If you have strong ones leading your deck, double up to increase your consistency. Three of a weaker champion is often better than a one-of stronger pick.
Don't Forget Your Champions
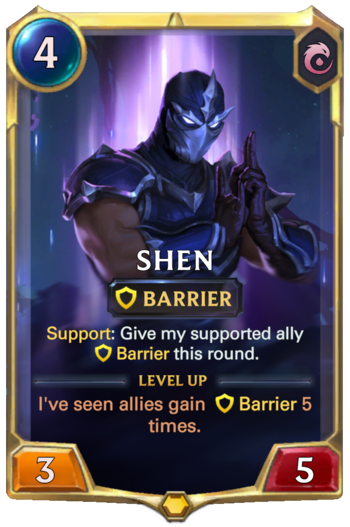
It is also key to get cards that work with your champions. The units are some of the most powerful in the game, and you want to ensure they have ways to level up as you go through your turns.
For instance, picking Ashe with no Frostbite cards or Yasuo with little stun/recall is not a good play. There is something to be said about getting a strong deck despite your champions, but that is never the mindset you want to have when starting your Expedition.
Leveling up your champions is not vital. In fact, you should never give up good cards just to get ones that work with the leaders. However, it is something to keep in mind as you make your picks. If you have two similar picks, and one works with your heroes, that should get the nod.
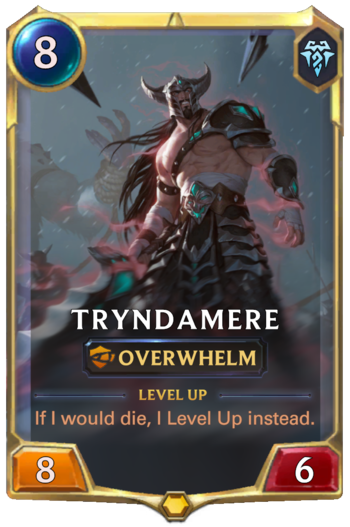
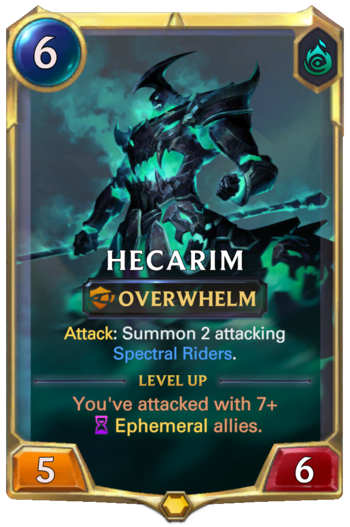
This note is why it is better to get champions that work on their own with little support (such as Tryndamere or Hecarim). Having a champion that is not dependent on other cards allows you a lot more flexibility than something like Teemo.
The Power of the Curve
Another key part of building a strong Expedition deck is the curve. A curve refers to having cards that you can play at all parts of the game. Decks with a high curve start low and have cards that cost eight, nine, or ten mana, while low-curve decks cap out with four, five, or six mana cards.
When drafting it is easy to get caught up picking big, flashy end-game threats. Though such options may work for your build, you always want something to do early on so you don't get run over by faster decks.
Aggressive builds want their curve to be quite-low, topping out at around five, while slower decks want a smooth curve that starts at one, two, or three and gradually climbs up to eight, nine, or ten. Finding this balance simply comes down to the style of deck you're playing.
Do also note that spell mana can change your curve a little bit. While you still want cheap spells, you can get away with a few more midrange options since you'll be able to cast them earlier than you normally would. Ramp cards affect this as well.
The Importance of Removal
As with any draft format, you never know what you're going to face during an Expedition. As such, unless your deck has an extreme focus or theme, versatility is key.
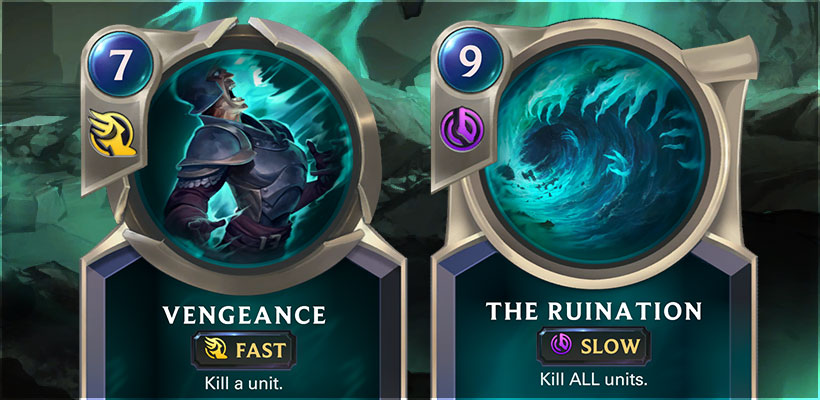
No cards are more versatile than removal spells. While early game units or big finishers might be good in certain situations, Vengeance and The Ruination will always kill whatever your opponent plays. In that way, they make you ready for anything.
This does not mean that you should always value removal over your other options, but you should put it quite high on your list. Synergy is the first thing to look for when deck building. If you can't find that, or if your wild card picks are all over the place, always choose removal.
Finding the Right Balance
Spells are an incredibly important way to adapt to the unpredictable Expedition meta. Even so, if you get too many you won't be able to actually put pressure on your opponent's health. On the other hand, if you get too few you'll have no way to control the board.
There is no one magical balance between spells and units. Typically, getting strong units backed up by a few key spells is the way to go. However, that doesn't hold up for Karma or Ezreal decks that want a lot of different spells and few units.
The balance you strike will come down to the synergy picks you get, as well as what you want for your champions. Just remember that, unless you're going for a pure control deck, you do need to get units on the board at one point or another.
Expeditions are an incredibly fun experience, especially because Riot lets you double dip when venturing out into the unknown. Two trials at once allows for a lot of fun and gives you the opportunity to take chances you wouldn't take in other games.
The above guide will ease you into the format, and the tips at the bottom give you an idea of how to build a competitive deck. Of course, there is no catch-all rule on how to have a successful Expedition, but if you follow along to this guide you'll have a good place to start.


 21
21
 19
19


 17
17
 20
20
 3
3


You need to log in before commenting.